Pioreactor dev blog #19 - New hardware pages
We've been working with a cluster of prototype Pioreactors with slight build modifications, but we have settled on an optimized design. As such, we've recently updated our documentation site to include a new hardware setup section in our User Guide. Check it out!
When users assemble products themselves, they gain a lot more in-depth knowledge on the product. Especially with hardware for experiments, we want users to have a basic understanding of each part and how they function together. Troubleshooting becomes much easier, and tinkerers can use this basic knowledge to expand their Pioreactor to suit their needs.
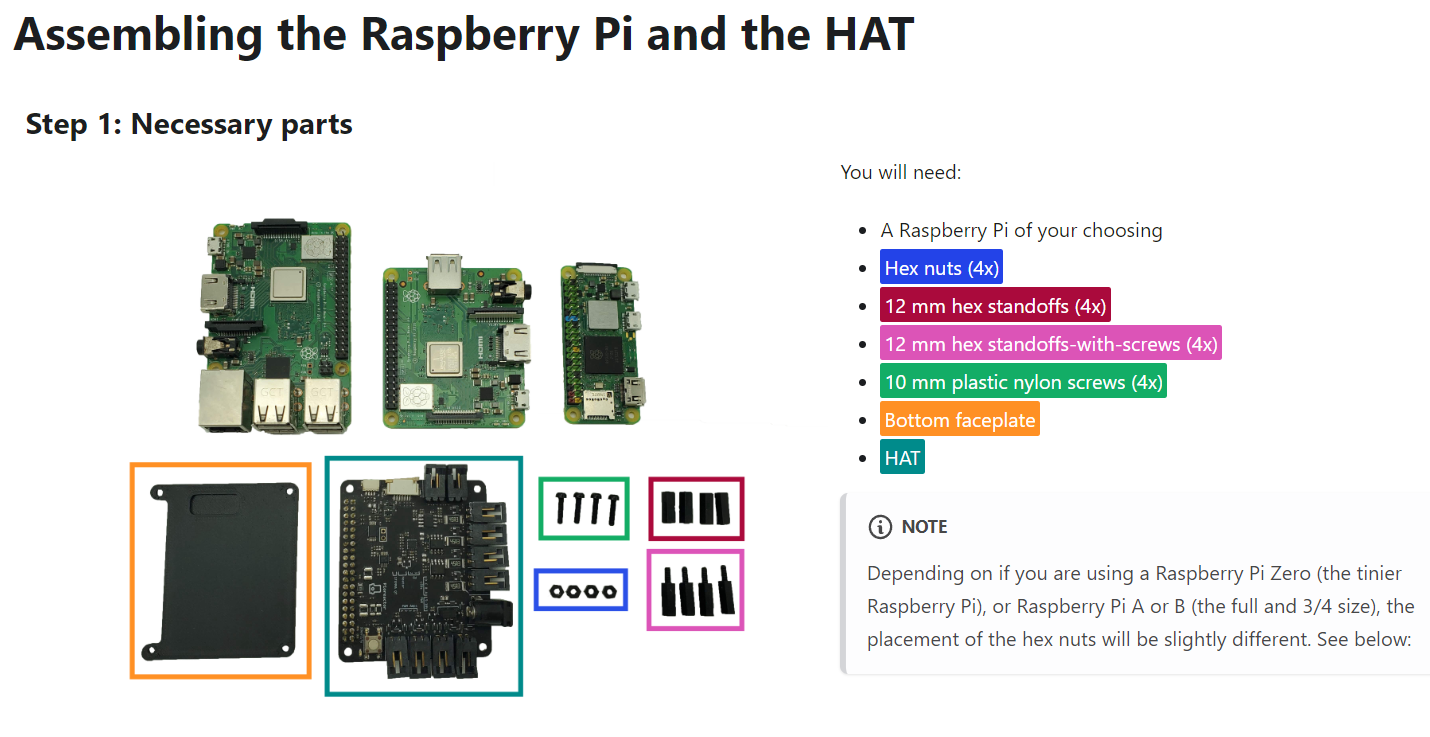
Pioreactors will be shipped out disassembled, so we created instructions with pictures to aid in setup. We have a new section on our documentation site that contains instructional blocks with images on the left and written steps on the right. To guide users, instructions are highlighted with colours that correlate with markings on the images (circles, arrows, etc.).

Figure 1: An instructional block found in our hardware setup guide.
We split our assembly instructions into 5 pages to isolate important components of the Pioreactor. You only really need to understand 5 "pieces", or aspects of the Pioreactor:
- The Rpi and HAT, which control everything else.
- The vial holder.
- The fan with magnets for stirring (the stirring PCB).
- The heating PCB placed under the vial holder.
- PD/IR bulbs for OD readings.
With these, you have all the parts for a basic Pioreactor assembly!

Of course, there's flexibility in the port/cable connections depending on whatever experiment you'd like to pursue. A great example that we're working on right now is algae growth, where we included two additional LED bulbs in channels C and D to create a day and night cycle. We plan on implementing these block-style instructions on our Experiments page in the near future.

